Steps to follow
Below are the steps required to create a Wiki in GXportal.
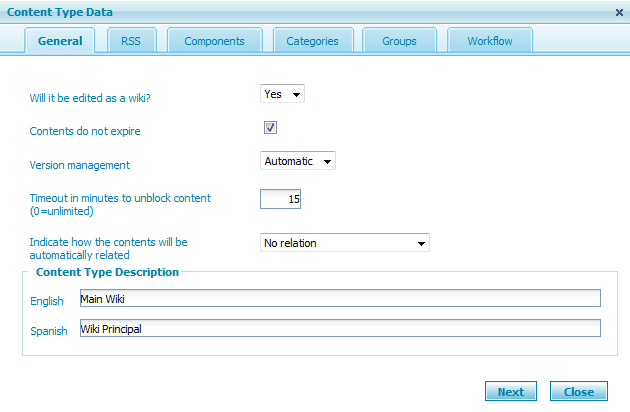
First, you have to create a content type and set it to be edited as a Wiki, as shown in the figure below.
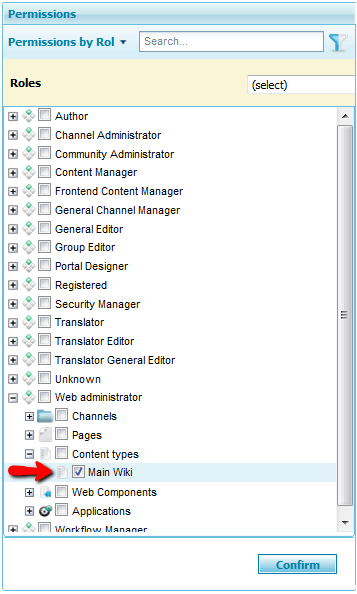
Don't forget to assign rights on the content type to the corresponding users. To do so, go to Configuration – Rights and assign them as shown below:
A content item will be automatically created with the same name as the entered content type. This content item, which will be used later, is the basis to start creating the Wiki.

Next, go to the page where you want to add the Wiki and in the desired region add a GXportlet and select the Wiki GXportlet, as shown in the image below:
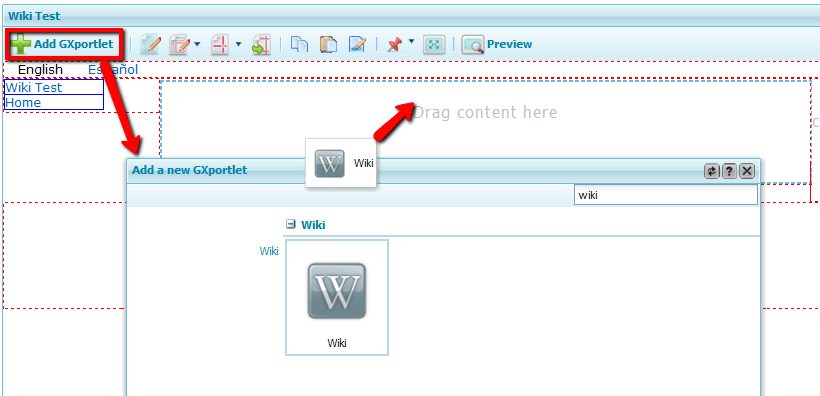
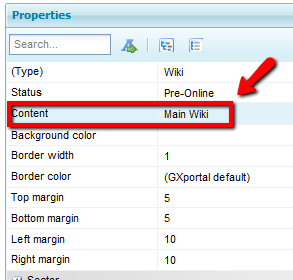
The properties dialog will be displayed for you to select the automatically created content item that was mentioned in step two.
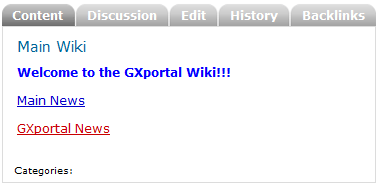
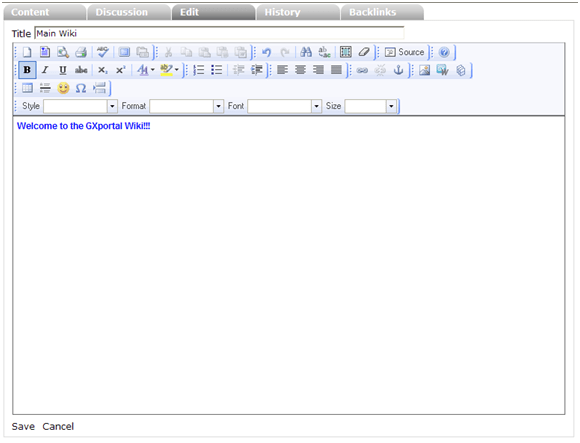
Once the Wiki has been added, it will look as shown below:

Go to the page preview and click on Edit to edit the Wiki.
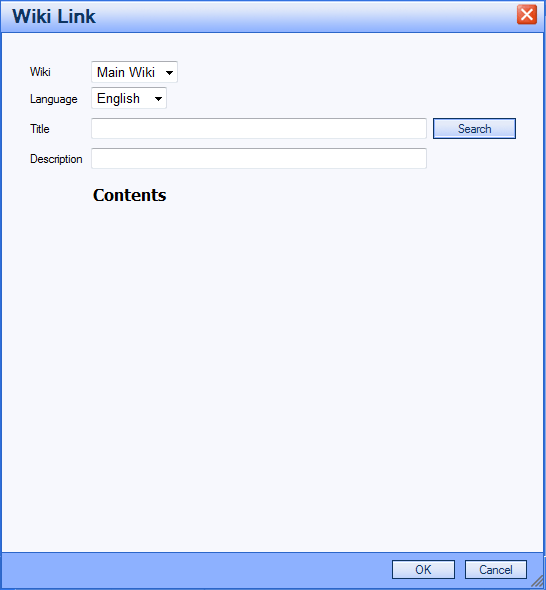
The "Wiki Link"  icon allows you to add links to other content items. Pressing the button in the editor will display the following screen:
If you enter all or part of a content item title in the "Name" field and press the Search button you will see the following screen:
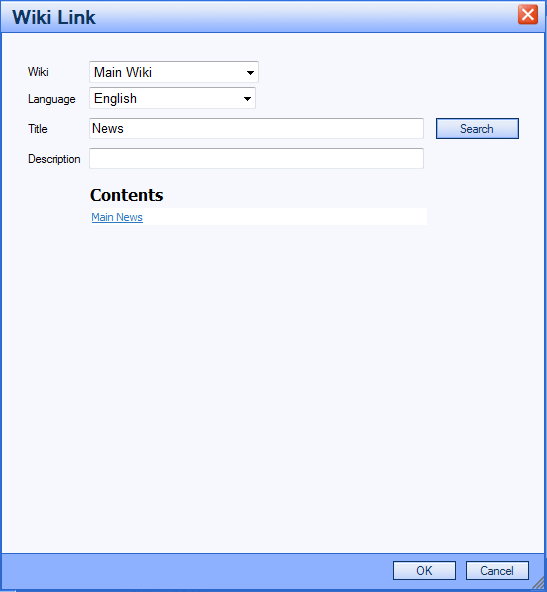
As we saw in the previous image, the contents associated with that search are displayed and clicking on them creates a link to each content item.
In addition to creating a link to an existing content, you can add a link to one that hasn't been created yet. To do so, enter its name and description; when you click on the link you will be able to edit the new content.
Press the save button and you will view the changes implemented in the Wiki: