| | | | What can be done on the image editor? |
We can access the image editor from Design - Images and Animations – Design Option,
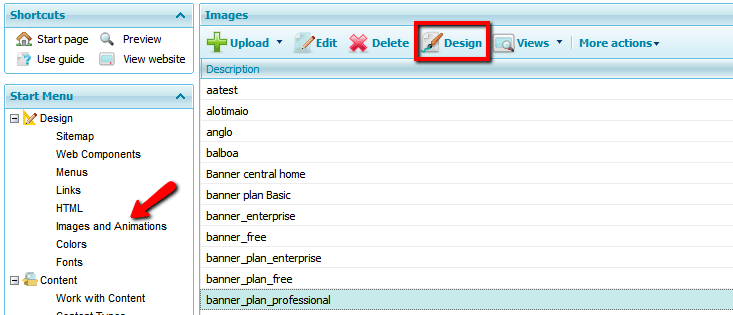
or from an Image Gallery portlet, Image or Slider, by pressing the button below

If we access the editor from this option in an Image Gallery or Slider portlet, then all the images contained in it will be opened. This is useful when we want them to have the same effects, borders, colors, sizes, etc.
The fixed tools on the upper bar of the editor,
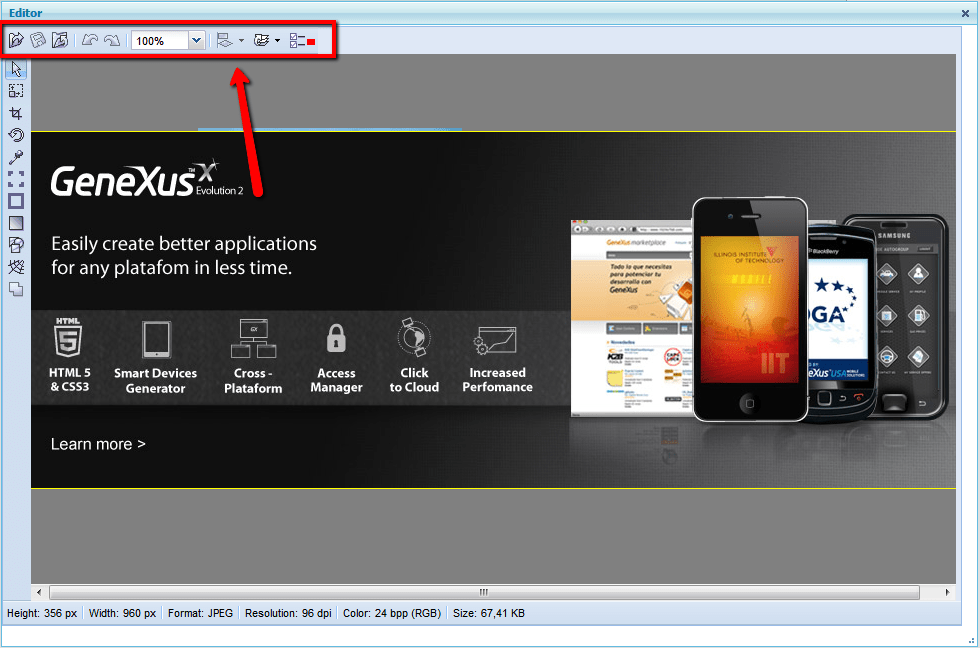
enable us to:
 Open a new image Open a new image
 Save changes Save changes
 Close the image selected Close the image selected
 Undo changes Undo changes
 Redo changes Redo changes
 Zoom IN/OUT Zoom IN/OUT
 Align images (enabled when we select more than one image) Align images (enabled when we select more than one image)
Possible alignments are:
On the sides (left  , right , right  , upper , upper  or lower or lower  ) )
Centered (horizontally  or vertically or vertically  ) )
Facing one another (horizontally  or vertically or vertically  ) )
 Change the order in which images are overlapped Change the order in which images are overlapped
To modify the order, an image may be moved:
 On top of the others On top of the others
 One level up One level up
 One level down One level down
 Under the others Under the others

The editor's lateral bar,
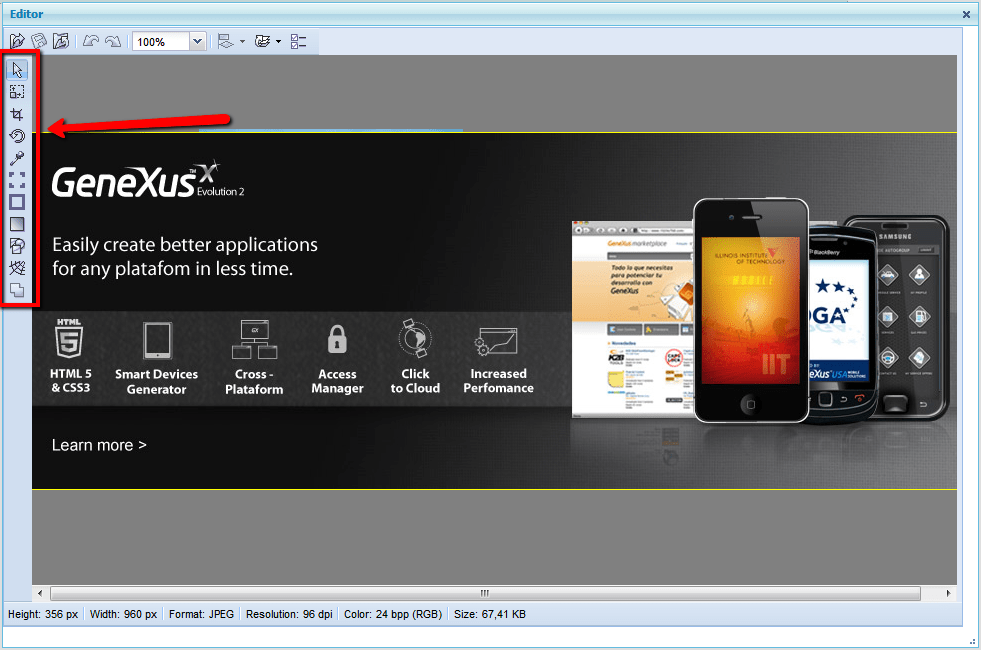
contains the image editing tools. Some of these add options to the upper bar.
What can we do with these?
 Select and move images in the editor Select and move images in the editor
 
Change size
Allows modification of the width and height and the determination of a relation between both.
 
Select an area of an image and discard everything outside that area.
On the upper bar we can see the size and location of the area selected.
 
Rotate the layer selected.
Options: 90°Right, 90°Left, 180°, inverse horizontal, inverse vertical.
 
Choose a color of an image’s pixels and save it in the site’s colors.
In the upper bar we can see the RGBA levels (red, green, blue, and alpha channels) of the color selected.
 
Modify corners.
Options: rounding, inverse rounding, bevel, box. We can also define the size and color of the corners’ background.
 
Add a border.
In the upper bar we configure the width for each side and the border’s color.
 
Apply different photographic effects.
We can choose from black and white, a scale of grays, sepia tones and inverted. And also define the intensity of the effect.
 
Establish links in different areas.
In the upper bar we can select the shape for the link’s area, write the text of the tooltip and the link’s URL (or select a catalogued link) and define how we want that link to be opened (current window, primary, new).
 
Select the format in which the site will be saved.
Options: JPG, GIF and PNG (quality may only be defined for JPG format).
 
Combine images (with the possibility of selecting more than one).
In the upper bar we see the final size and we can select the background color.
NOTES:
Any change made must be applied ( ) so that it is saved when the tool changes. ) so that it is saved when the tool changes.
To select more than one image you must click on them while pressing down on the CTRL key.
Video demo:
Editor de imágenes
|
| | | | | | | | |
| |
|